Base HRM - Employees: Customize the view on the Employees tab in
Đã sửa đổi vào: Fri, 9 Tháng 5, 2025 lúc 4:31 CH
Purpose: The HR information management experience can now be easily personalized to each user's needs. Specifically:
- Easily hide, show, change the order of columns you want to view
- Customize the width and height of a cell
- Save filters, sort for next use
"Employees" screen
+ 6 tabs Overview, Salaries & Offers, Taxes & Legals, Times & Attendances, Teams and Managers, Profiles & Contacts are the default interface.
Admin HRM without Payroll and Account permissions still cannot view the "Salaries & Offers" view and related Custom Fields.
 + You can also perform the following operations: Manage views, create new views, filter, sort and customize row heights.
1. View management:
Easily view, search, and drag and drop the order of displayed views
- Select "All views" >> Click on each view to see details, or adjust the display order of views on the interface.

2. Hide, show, change column order in a view:
2.1 Create a new view:
Click “Add view" to create a new view.
 The form interface is created as follows:

- View name: Cannot have the same name as existing views. Default views cannot be renamed.
- Search: Search for selected and unselected information fields
- Select columns: When selecting an information field, that field will be displayed in “Selected column” and disappear in “Select columns”.
The information fields are grouped into 6 fixed groups (General profile; Work information; Working status; Salary, rewards and benefits; Timesheet & attendance; Contract & documents).
All columns in the same group can be selected by pressing the “>>” button next to each group.
- Selected columns:
Default has "Employee name field, cannot be deleted or changed order
You can drag and drop to change the order of selected columns.
Delete the columns you want to display by pressing the “x” button: on each field or select "Delete all columns": the fields will immediately move to "Select columns" and disappear at "Selected columns".
- After successfully creating a new view, the system navigates the user to the new view, located at the end of the view list.
2.2. Edit, duplicate current view:
- Click on the three-dot icon next to the view name, users can find the view editing/clone operation with the edit/clone form similar to the create form.
- After successful cloning, the system navigates the user to the new view, located at the end of the view list.

2.3. Remove view.
- Except for default views, when clicking on the three-dot icon next to the view name, you can delete the view.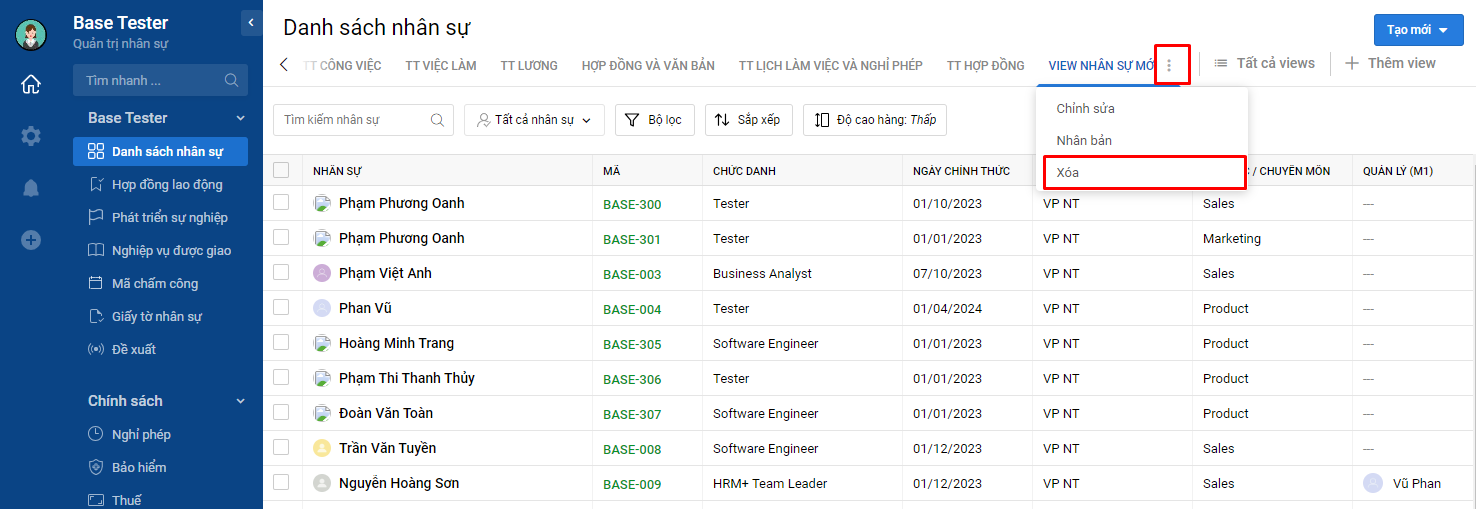
3. Filter
- Filter mode "All employees" in quick filter of personnel status

- Filter: Create detailed filters based on multiple conditions/multiple information fields at the same time, so users can easily look up and track information.
Step 1: Click “Filter” to display the filter menu on the right.
Step 2: Click “Add new filter” to select the fields you want to filter.
Step 3: After selecting any field, the system displays the operator box and the value you want to filter for that field.
Step 4: Click “Apply” to start filtering or “Reset” to clear all selected fields.
Step 5: If you want to save the filter for future use, click “Save” or “Save as new view”. If you want to return to the old view, click “Delete”.
 - Note:
Currently it is not possible to filter table fields.
With date and time information fields, in addition to allowing filtering by specific days, the system supports filtering flexible values such as: Today, Yesterday, Tomorrow, 7 days ago, 7 days later, This month, Last month, Next month.
4. Arrange
- Replace the sorting in each column with the right sorting menu, helping users easily track the sorting order of information fields.

Step 1: Click “Sort” to display the sorting menu on the right
Step 2: Click “Add new sort” to select the information fields you want to sort.
Step 3: Drag and drop to change the sorting order as desired.
Step 4: Click “Apply” to start sorting or “Reset” to clear all selected fields”.
Step 5: If you want to save the arrangement for later use, click “Save” or “Save as new view”. If you want to return to the old view, click “Delete”.

In addition, it is currently not possible to sort information related to username tags such as: Account, Manager (M1-2-3), Colleague (P1-2-3-4-5)
5. Customize column width, row height
- Similar to Excel, you can drag and drop the desired column width. The column width will be automatically saved for future viewing.

- Row height can be customized at 4 fixed levels: Low, Medium, High and Very High. Row height will be automatically saved for future viewing.
Low (default): 1 line of text
Medium: 2 lines of text
Height: 4 lines of text
Very high: 6 lines of text


Câu trả lời này có giúp ích cho bạn không? Yes No
Send feedbackRất tiếc là chúng tôi không giúp được nhiều. Hãy giúp chúng tôi cải thiện bài viết này bằng phản hồi của bạn.